C++ vscode环境配置
c/c++ 编译器, 下载与安装
gcc: GCC(GNU Compiler Collection)是由 GNU 开发的编程语言编译器。
GCC编译工具链(toolchain),是指以GCC编译器为核心的一整套工具,主要包括:
- gcc-core:即GCC编译器,用于完成预处理和编译过程,把C代码转换成汇编代码。
- Binutils :除GCC编译器外的一系列小工具包括了链接器ld,汇编器as、目标文件格式查看器readelf等。
- glibc:包含了主要的 C语言标准函数库,C语言中常常使用的打印函数printf、malloc函数就在glibc 库中。
window :下载 MinGW,MinGW - Minimalist GNU for Windows - Browse Files at SourceForge.net,并配置环境变量。
linux:自带,或者使用包管理器进行安装
1 | |
Clang: 是一个编译器,目前用来编译C、C++、Objective-C语言。
Clang只是一个编译器前端,其将上述的C类语言编译成一种“汇编语言(中间语言)”。接着,通过LLVM(Low Level Virtual Machine)作为后端,将这种“汇编语言”编译成针对不同机器的二进制机器语言。
windows: LLVM Download Page, 下载安装后配置环境变量。
linux:
1 | |
windows 平台也可以直接安装 visual studio,使用 vs 的C++ 库。
vscode环境配置:
下载vscode
下载插件:C/C++ , code runner
ctrl shift p 打开命令栏
编译环境配置c_cpp_properties.json:
输入C/C++,选择“Edit Configurations(UI)”进入配置。这里配置两个选项: - 编译器路径 和 IntelliSense 模式, 可以根据 安装的 编译器 gcc 或者是 clang 进行配置。配置完成后,此时在侧边栏可以发现多了一个.vscode文件夹,并且里面有一个c_cpp_properties.json文件。该文件即为编译环境的配置文件。我的配置为 gcc 编译器。
1
2
3
4
5
6
7
8
9
10
11
12
13
14
15
16
17
18
19
20
21
{
"configurations": [
{
"name": "Win32",
"includePath": [
"${workspaceFolder}/**"
],
"defines": [
"_DEBUG",
"UNICODE",
"_UNICODE"
],
"windowsSdkVersion": "10.0.19041.0",
"compilerPath": "D:/mingw-w64/x86_64-8.1.0-release-posix-seh-rt_v6-rev0/mingw64/bin/g++.exe",
"cStandard": "c17",
"cppStandard": "c++17",
"intelliSenseMode": "windows-gcc-x64"
}
],
"version": 4
}构建任务配置tasks.json:
打开命令栏,输入tasks,选择“Tasks:Configure Default Build Task”,再选择“C/C++: g++.exe build active file” 如果是 clang,则选择对应的 cl.exe 进行配置,选择完成之后,会生成一个tasks.json的配置文件。
1
2
3
4
5
6
7
8
9
10
11
12
13
14
15
16
17
18
19
20
21
22
23
24
25
{
"version": "2.0.0",
"tasks": [
{
"type": "cppbuild",
"label": "C/C++: g++.exe 生成活动文件",
"command": "D:\\mingw-w64\\x86_64-8.1.0-release-posix-seh-rt_v6-rev0\\mingw64\\bin\\g++.exe",
"args": [
"-fdiagnostics-color=always",
"-g",
"${file}",
"-o",
"${fileDirname}\\${fileBasenameNoExtension}.exe"
],
"options": {
"cwd": "${fileDirname}"
},
"problemMatcher": [
"$gcc"
],
"group": "build",
"detail": "编译器: D:\\mingw-w64\\x86_64-8.1.0-release-posix-seh-rt_v6-rev0\\mingw64\\bin\\g++.exe"
}
]
}调试环境配置:
点击菜单栏的Debug–>Start Debugging:选择C++(GDB/LLDB):会生成一个launch.json的文件,该文件记录了调试相关配置。
1
2
3
4
5
6
7
8
9
10
11
12
13
14
15
16
17
18
19
20
21
22
23
24
25
26
27
28
29
30
31
{
"configurations": [
{
"name": "C/C++: g++.exe 生成和调试活动文件",
"type": "cppdbg",
"request": "launch",
"program": "${fileDirname}\\${fileBasenameNoExtension}.exe",
"args": [],
"stopAtEntry": false,
"cwd": "${fileDirname}",
"environment": [],
"externalConsole": false,
"MIMode": "gdb",
"miDebuggerPath": "D:\\mingw-w64\\x86_64-8.1.0-release-posix-seh-rt_v6-rev0\\mingw64\\bin\\gdb.exe",
"setupCommands": [
{
"description": "为 gdb 启用整齐打印",
"text": "-enable-pretty-printing",
"ignoreFailures": true
},
{
"description": "将反汇编风格设置为 Intel",
"text": "-gdb-set disassembly-flavor intel",
"ignoreFailures": true
}
],
"preLaunchTask": "C/C++: g++.exe 生成活动文件"
}
],
"version": "2.0.0"
}配置生成文件到 build 目录下:
插件平台搜索 code runner ,打开 settings.json 文件,找到以下配置:
1
2"c": "cd $dir && gcc $fileName -o **.\\build\\**$fileNameWithoutExt && **.\\build\\**$dir$fileNameWithoutExt",
"cpp": "cd $dir && g++ $fileName -o **.\\build\\**$fileNameWithoutExt && **.\\build\\**$fileNameWithoutExt",添加上 build 目录的位置,然后在项目工程目录下,新建一个build 文件夹。
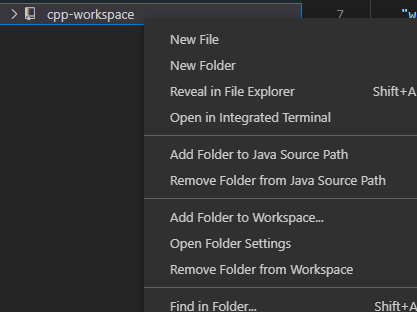
添加当前项目工程目录到 vscode workspace下:选择 add folder to workspace
配置完成之后的目录结构:

1
2
3
4
5
6
7
8
9
10
├─.vscode
│ c_cpp_properties.json
│ launch.json
│ tasks.json
│
└─src
│ helloworld.cpp
│
└─build
helloworld.exe
visual studio 环境:
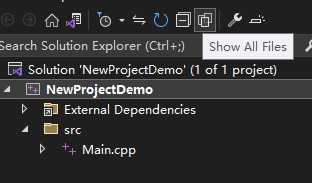
新建一个新的空项目:
选择:show all files
properties 设置:

选择 all configurations 和 all platforms
设置 output directory:$(SolutionDir)\bin$(Platform)$(Configuration)\
设置 intermediate directory:$(SolutionDir)\bin\intermediates$(Platform)$(Configuration)\
这样设置会使得生成的文件有一个好的目录结构:
1 | |